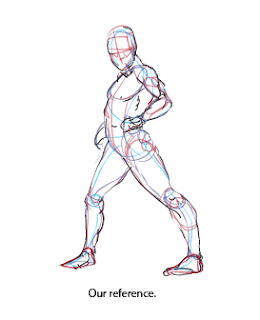
Here is something to help you practice setting up a figure drawing. The following exercise is a way to help simplify the process of drawing a human figure.
Why would we simplify the human figure when drawing? There are many reasons to do this. One reason may be the need to draw quickly. For example, you may only have a minute or two to draw before the model changes the pose so the need to simplify becomes necessary.
Another reason is that those who are new to drawing the figure find it very difficult to do. The human figure is a complex collection of forms and can it feel a bit overwhelming at times trying to draw this complexity. One solution to this is to pick and choose the elements that you are going to work on first in order to create a process that allows you to work on the drawing one step at a time.
There are several ways to organize and divide the process into simple steps. I would say that there are as many approaches to the process of drawing as there are artists. How you choose to organize your drawing process is up to you. Just remember that looking for ways to simplify the drawing in order to focus on one or two things at a time will help you troubleshoot problems and make drawing the human figure easier.
In the steps I show below I look for the skeleton within the figure, then drawn it simplistically to work out the gesture and the relative sizes of the forms or parts of the body.
Let's begin. To see the rest of the post click on the read more link below.
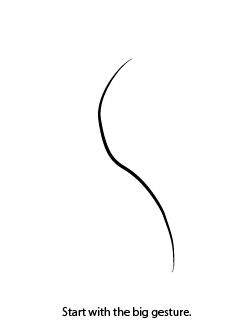
The Gesture Line

This first line is just the general line of action found within the figure distilled into one line. Here, I tried to evaluate the position of the forms of the figure, consider the movement of the figure, and illustrated my interpretation as one fluid line.
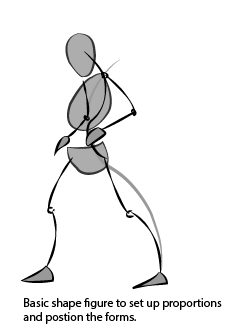
The next thing I decided to do is to start drawing a simplified version of the figure. In this example, I decided to start by drawing a skeleton simplified into basic shapes and lines as this is a good way to start looking for the underlying structures and forms of the figure.
Here, I started with the legs and hips because I felt the leg on our right followed the gesture line closely allowing me to build off of the information I have already drawn.
Also, by drawing the legs and hips first I can set up the sense of weight for the figure in this drawing. This helps me avoid the problem of the figure appearing to float on the page or appearing off balance in the drawing.
Also, by drawing the legs and hips first I can set up the sense of weight for the figure in this drawing. This helps me avoid the problem of the figure appearing to float on the page or appearing off balance in the drawing.
As a side note, you do not need to follow the order exactly I illustrate here. You may find it easier to start at a different starting point or follow a different order of steps. That is fine. The goal in this process is to work out some sort of order that assists you in setting up a figure drawing.
Next, I drew a new gestural line to represent the spine. Though I feel my initial gesture line captured the general movement of the figure I didn't just put the head at the top of that initial line. This would be a mistake. I needed to go back and determine where the spine is more precisely.
I reevaluated the position of the head relative to the hips and imagined how the spine would connect the two together. I then drew the spine as a single line connected to the hips.
The Head
After I drew the spine, I then placed the head into the drawing. Again, I needed to evaluate where the head should be placed compared to the position of the other forms of the figure.
Here, I also needed to be aware of the size of the head compared to the size of the hips. Proportions are very important when drawing the figure. If the head appears too large or too small then the drawing won't feel believable as a real person.
The Rib Cage
Next, I drew the rib cage as a simple egg shape with the narrow end of the egg pointing towards the head. When doing this I need to be aware of how it connects to the spine and its tilt. I do not want the shape of the rib cage to be drawn vertically between the head and hips as this is not a natural position for the rib cage within the body. The rib cage angles back towards the shoulders naturally. Also, this figure is leaning back just slightly in this pose.
Again, I need to be aware of the size of the rib cage compared to the head and the hips to make sure my proportions are right.
The Arms
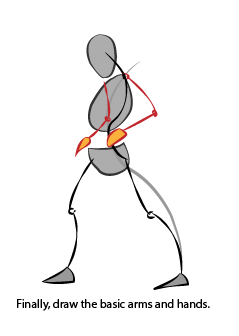
When using this approach to the initial drawing I usually like to do the arms last. The reason for this is that the arms are forms that hang off the torso and I feel it's easier to connect the arms to the torso than it is to try to fit a rib cage between the arms in the drawing.
As with the legs, I drew the arms as lines with points to represent the joints and simple shapes to represent the hands. This helps create a structure in the drawing that mimics the skeleton. This will be helpful later on when it comes time to illustrate the muscular forms and the other contours of the body. This also allows you to make sure the limbs are bending at the right place and the proportions of the parts of the limbs are described accurately at an early stage.
When drawing the shapes for the hands I think that the simpler the shape the better at first. You may find that you will want to move the hand either to be more accurate to the original pose or to make the gesture of the drawing more interesting. If you invest in drawing all the small details, such as the fingers, before you are happy with the proportions and positioning, you will just have to start all over on those details after you move the hand. Wait on drawing the fingers until you are satisfied with the initial setup of your drawing. Once satisfied, you are ready for the smaller forms and details.

This is just a way to simplify things when starting a figure drawing. If you have the opportunity to attend a life drawing session (a place that hires a model to pose while you draw), this a great way to practice this. Practice by asking the model to pose for a couple of minutes at a time and draw following the process above. Then do it again. Continue to do this until you feel comfortable you have this down.
If you can't attend a life drawing session, you can still practice this, maybe ask a friend to pose for a minute at a time so that you can draw that pose.
Enjoy drawing.
If you can't attend a life drawing session, you can still practice this, maybe ask a friend to pose for a minute at a time so that you can draw that pose.
Enjoy drawing.


